This started-off as a how-to on installing ownCloud. But their own installation procedures don’t work for the 8.0x release and CentOS 6.
Most of you know I’ve been interested in distributed / cloud storage for quite some time.
And that I find MooseFS to be fascinating. As of 2.0, MooseFS comes in two flavors – the Community Edition, and the Professional Edition. This how-to uses the CE flavor, but it’d work with the Pro version, too.
I started with the MooseFS install guide (pdf) and the Pydio quick start steps. And, as usual, I used Digital Ocean to host the cluster while I built it out. Of course, this will work with any hosting provider (even internal to your data center using something like Backblaze storage pods – I chose Digital Ocean because they have hourly pricing; Chunk Host is a “better” deal if you don’t care about hourly pricing). In many ways, this how-to is in response to my rather hackish (though quite functional) need to offer file storage in an otherwise-overloaded lab several years back. Make sure you have “private networking” (or equivalent) enabled for your VMs – don’t want to be sharing-out your MooseFS storage to just anyone 🙂
Also, as I’ve done in other how-tos on this blog, I’m using CentOS Linux for my distro of choice (because I’m an RHEL guy, and it shortens my learning curve).
With the introduction out of the way, here’s what I did – and what you can do, too:
Preliminaries
- spin-up at least 3 (4 would be better) systems (for purposes of the how-to, low-resource (512M RAM, 20G storage) machines were used; use the biggest [storage] machines you can for Chunk Servers, and the biggest [RAM] machine(s) you can for the Master(s))
- 1 for the MooseFS Master Server (if using Pro, you want at least 2)
- (1 or more for metaloggers – only for the Community edition, and not required)
- 2+ for MooseFS Chunk Servers (minimum required to ensure data is available in the event of a Chunk failure)
- 1 for PyDio (while this might be able to co-reside with the MooseFS Master – this tutorial uses a fully-separate / tiered approach)
- make sure the servers are either all in the same data center, or that you’re not paying for inter-DC traffic
- make sure you have “private networking” (or equivalent) enabled so you do not share your MooseFS mounts to the world
- make sure you have some swap space on every server (may not matter, but I prefer “safe” to “sorry”) – I covered how to do this in the etherpad tutorial
MooseFS Master
- install MooseFS master
- curl “http://ppa.moosefs.com/RPM-GPG-KEY-MooseFS” > /etc/pki/rpm-gpg/RPM-GPG-KEY-MooseFS && curl “http://ppa.moosefs.com/MooseFS-stable-rhsysv.repo” > /etc/yum.repos.d/MooseFS.repo && yum -y install moosefs-master moosefs-cli
- make changes to /etc/mfs/mfsexports.cfg
- # Allow everything but “meta”.
- #* / rw,alldirs,maproot=0
- 10.132.0.0/16 / rw,alldirs,maproot=0
- add hostname entry to /etc/hosts
- 10.132.41.59 mfsmaster
- start master
- service moosefs-master start
- see how much space is available to you (none to start)
- mfscli -SIN
MooseFS Chunk(s)
- install MooseFS chunk
- curl “http://ppa.moosefs.com/RPM-GPG-KEY-MooseFS” > /etc/pki/rpm-gpg/RPM-GPG-KEY-MooseFS && curl “http://ppa.moosefs.com/MooseFS-stable-rhsysv.repo” > /etc/yum.repos.d/MooseFS.repo && yum -y install moosefs-chunkserver
- add the mfsmaster line from previous steps to /etc/hosts
- cat >> /etc/hosts
- 10.132.41.59 mfsmaster
- <ctrl>-d
- make your share directory
- mkdir /mnt/mfschunks
- add your freshly-made directory to the end of /etc/mfshdd.cfg, with a size you want to share
- /mnt/mfschunks 15GiB
- start the chunk
- service moosefs-chunkserver start
- on the MooseFS master, make sure your new space has become available
- mfscli -SIN
- repeat for as many chunks as you want to have
Pydio / MooseFS Client
- install MooseFS client
- curl “http://ppa.moosefs.com/RPM-GPG-KEY-MooseFS” > /etc/pki/rpm-gpg/RPM-GPG-KEY-MooseFS && curl “http://ppa.moosefs.com/MooseFS-stable-rhsysv.repo” > /etc/yum.repos.d/MooseFS.repo && yum -y install moosefs-client
- add the mfsmaster line from previous steps to /etc/hosts
- cat >> /etc/hosts
- 10.132.41.59 mfsmaster
- <ctrl>-d
- mount MooseFS share somewhere where Pydio will be able to get to it later (we’ll use a bind mount for that in a while)
- mfsmount /mnt/mfs -H mfsmaster
- install Apache and PHP
- yum -y install httpd
- yum -y install php-common
- you need more than this, and hopefully Apache grabs it for you – I installed Nginx then uninstalled it, which brought-in all the PHP stuff I needed (and probably stuff I didn’t)
- modify php.ini to support large files (Pydio is exclusively a webapp for now)
- memory_limit = 384M
- post_max_size = 256M
- upload_max_filesize = 200M
- grab Pydio
- you can use either the yum method, or the manual – I picked manual
- curl http://hivelocity.dl.sourceforge.net/project/ajaxplorer/pydio/stable-channel/6.0.6/pydio-core-6.0.6.tar.gz
- URL correct as of publish date of this blog post
- extract Pydio tgz to /var/www/html
- move everything in /var/www/html/data to /mnt/moosefs
- bind mount /mnt/moosefs to /var/www/html/data
- mount –bind /mnt/moosefs /var/www/html/data
- set ownership of all Pydio files to apache:apache
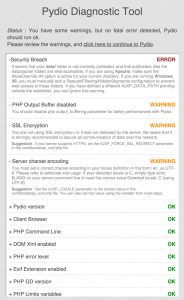
- start Pydio wizard
- fill-in forms as they say they should be (admin, etc)
- I picked “No DB” for this tutorial – you should use a database if you want to roll this out “for real”
- login and starting using it
Now what?
Why would you want to do this? Maybe you need an in-house shared/shareable storage environment for your company / organization / school / etc. Maybe you’re just a geek who likes to play with new things. Or maybe you want to get into the reselling business, and being able to offer a redundant, clustered, cloud, on-demand type storage service is something you, or your customers, would find profitable.
Caveats of the above how-to:
- nothing about this example is “production-level” in any manner (I used Digital Ocean droplets at the very small end of the spectrum (512M memory, 20G storage, 1 CPU))
- there is a [somewhat outdated] sizing guide for ownCloud (pdf) that shows just how much it wants for resources in anything other than a toy deployment
- Pydio is pretty light on its basic requirements – which also helped this how-to out
- while MooseFS is leaner when it comes to system requirements, it still shouldn’t be nerfed by being stuck on small machines
- you shouldn’t be managing hostnames via /etc/hosts – you should be using DNS
- DNS settings are far more than I wanted to deal with in this tutorial
- security has, intentionally, been ignored in this how-to
- just like verifying your inputs is ignored in the vast majority of programming classes, I ignored security considerations (other than putting the MooseFS servers on non-public-facing IPs)
- don’t be dumb about security – it’s a real issue, and one you need to plan-in from the very start
- DO encrypt your file systems
- DO ensure your passwords are complex (and used rarely)
- DO use key-based authentication wherever possible
- DON’T be naive
- you should be on the mailing list for MooseFS and Pydio forum.
- the communities are excellent, and have been extremely helpful to me, even as a lurker
- I cannot answer more than basic questions about any of the tools used herein
- why I picked what I picked and did it the way I did
- I picked MooseFS because it seems the easiest to run
- I picked Pydio because the ownCloud docs were borked for the 8.0x release on CentOS 6 – and it seems better than alternatives I could find (Seafile, etc) for this tutorial
- I wanted to use ownCloud because it has clients for everywhere (iOS, Android, web, etc)
- I have no affiliation with either MooseFS or Pydio beyond thinking they’re cool
- I like learning new things and showing them off to others
Final thoughts
Please go make this better and show-off what you did that was smarter, more efficient, cheaper, faster, etc. Turn it into something you could deploy as an AMID on AWS. Or Docker containers. Or something I couldn’t imagine. Everything on this site is licensed under the CC BY 3.0 – have fun with what you find, make it awesomer, and then tell everyone else about it.
I think I’ll give LizardFS a try next time – their architecture is, diagrammatically, identical to the “pro” edition of MooseFS. And it’d be fun to have experience with more than one solution.


Comments on “create your own clustered cloud storage system with moosefs and pydio”
Comments are closed.