We raise chickens.
For the last few years, we’ve only had layers – and they’ve all been full-grown by the time they arrived at our home.
This year, we decided to buy some chicks because our layers are starting to age-out of being able to lay, and we’re interested in trying our hand at raising a few birds for butchering ourselves.
Since you need to wait to add new birds to your flock until the birds are 6+ weeks old, we need a place for them to grow (they were ~8 days old when I bought them).
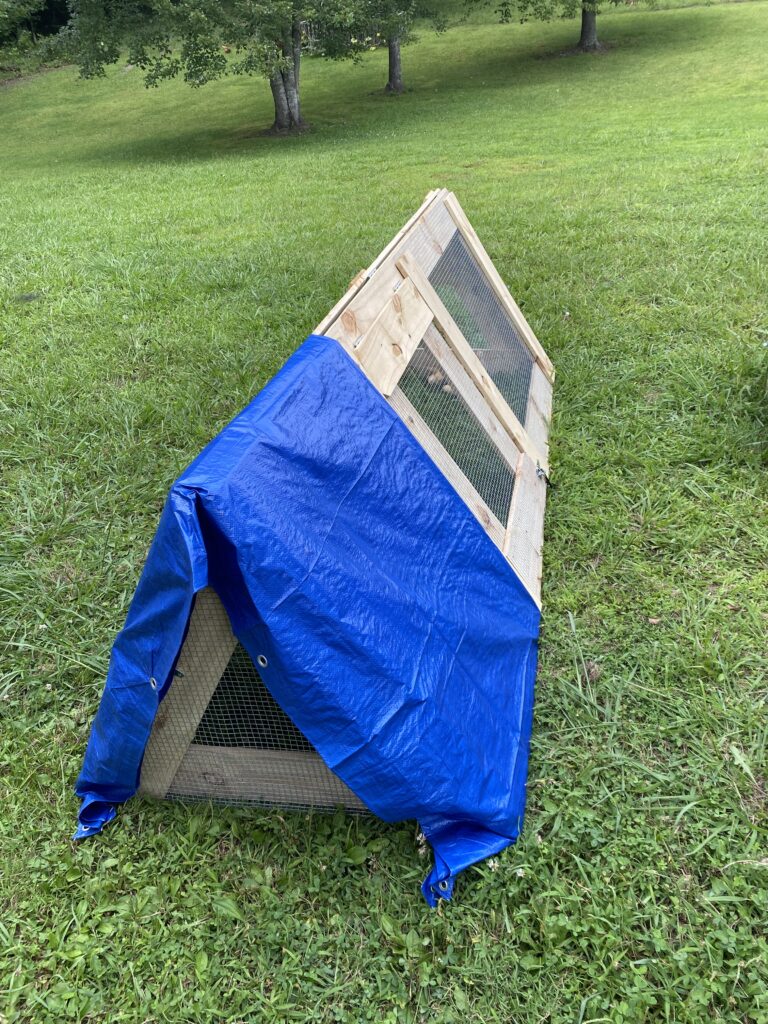
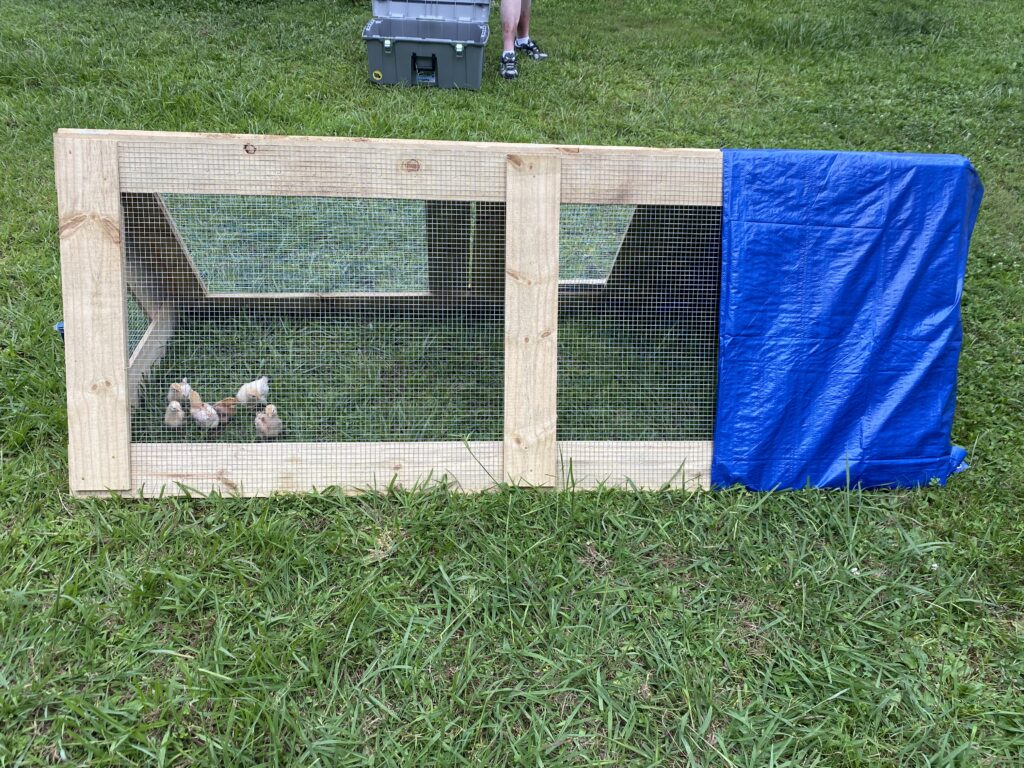
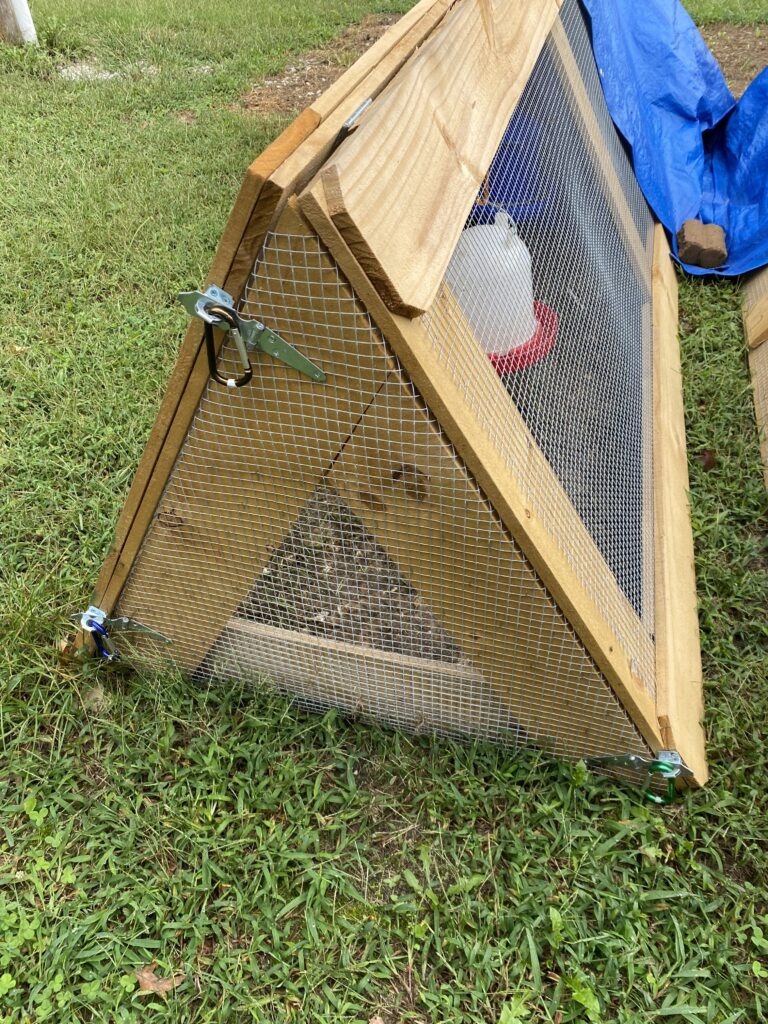
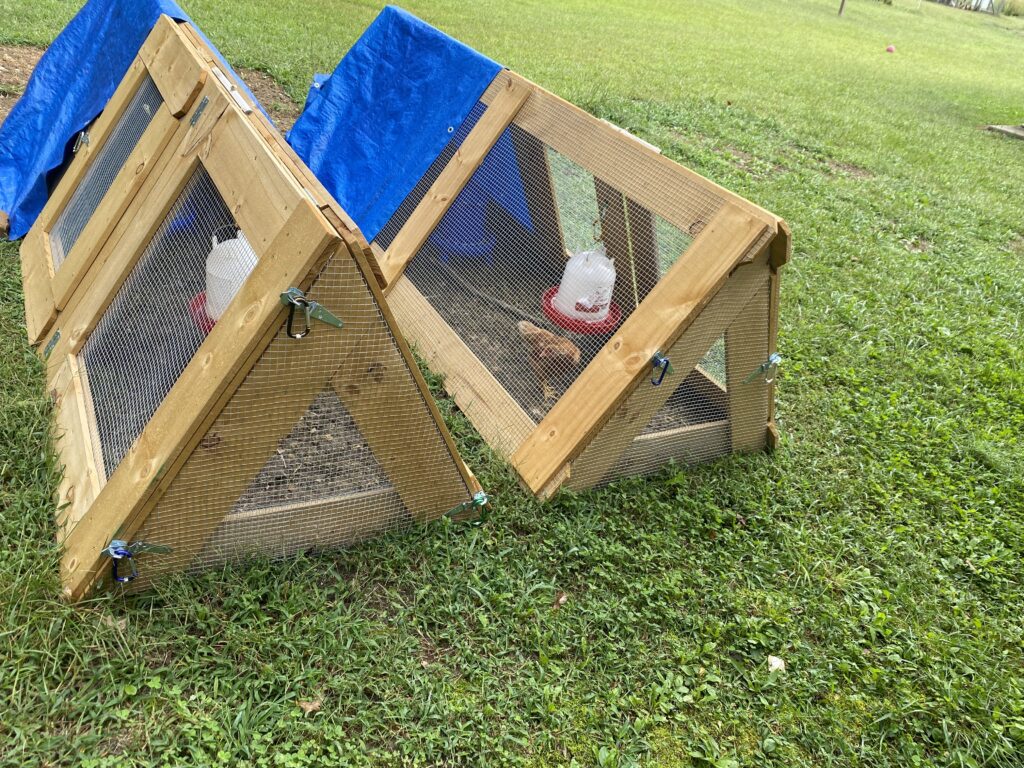
Here are some pictures of the first collapsible coopette for your viewing pleasure – after which I’ll describe how I put these things together ?
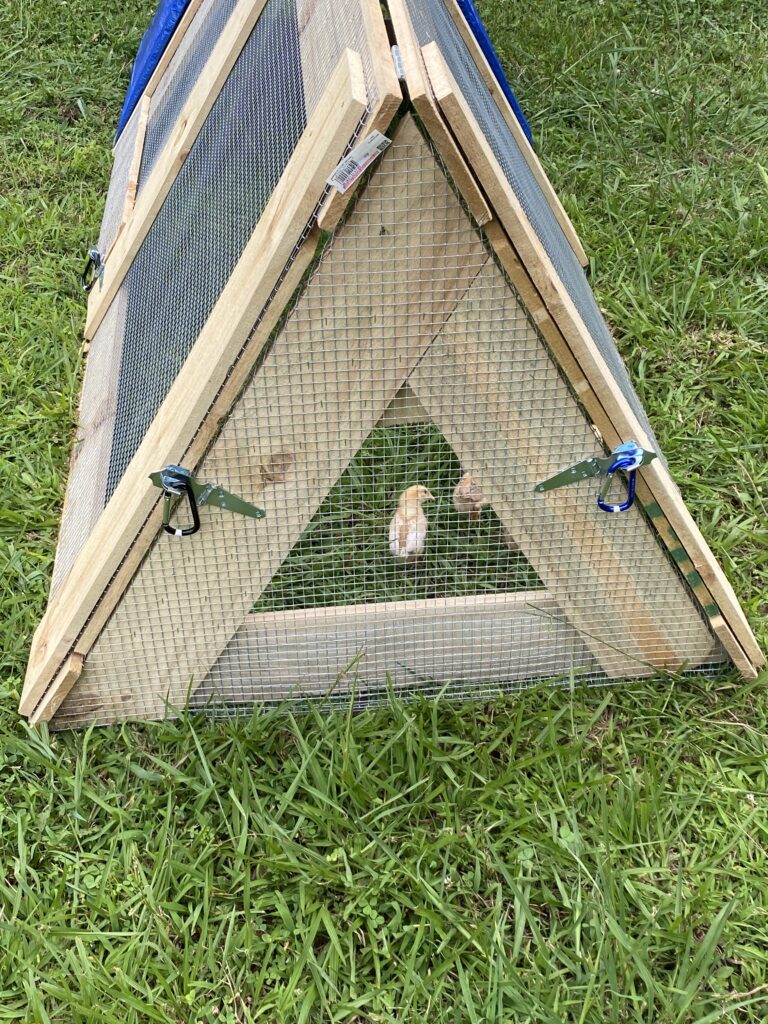
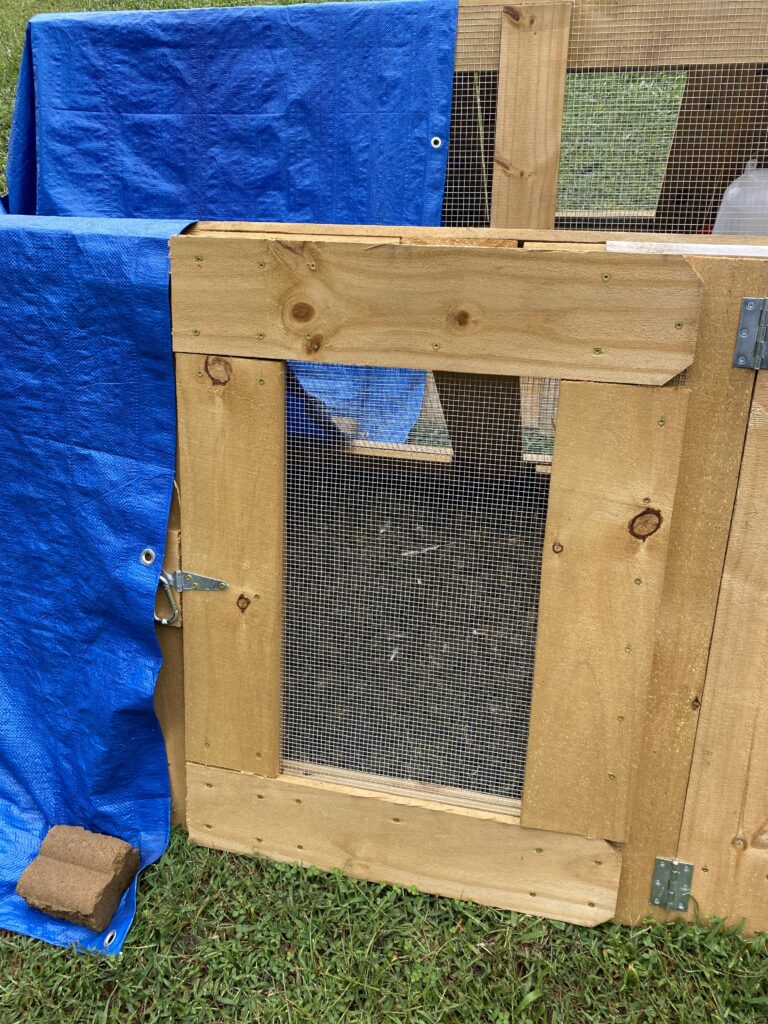
The first one (shown above) was the initial implementation of my idea…in which we decided hinging the access door on the top is less than ideal, and we discovered we need 3 hasps to hold the ends on rather than 2.
Materials used:
- Pressure treated 1x6x8 fence pickets (bought 29 for both coopettes, ended-up with about 3.5 left over – the second coopette is sturdier (and a little prettier)
- Half-inch opening, 36″ wide hardware cloth (need ~22′ per coopette; ~30′ if you choose to make bottoms (I opted to not make coopette bottoms this time around)
- Quarter-inch opening, 24″ wide hardware cloth (happened to have a perfectly-sized piece left from another project I could use on the second coopette door)
- Staples
- 1 1/4″ ceramic-coated deck screws
- 2.5″ hinges (5 per coopette … though I wish I’d gone with 3″ hinges instead)
- 3″ hasps (7 per coopette)
When folded-up, the sides collapse to ~3″ thick. The ends are about 2″ thick, too.
Total space needed against the side of your garage/shed/etc to store the coopette when you aren’t actively using it is ~3′ x 8′ x 6″, or slightly more than a folding table ?
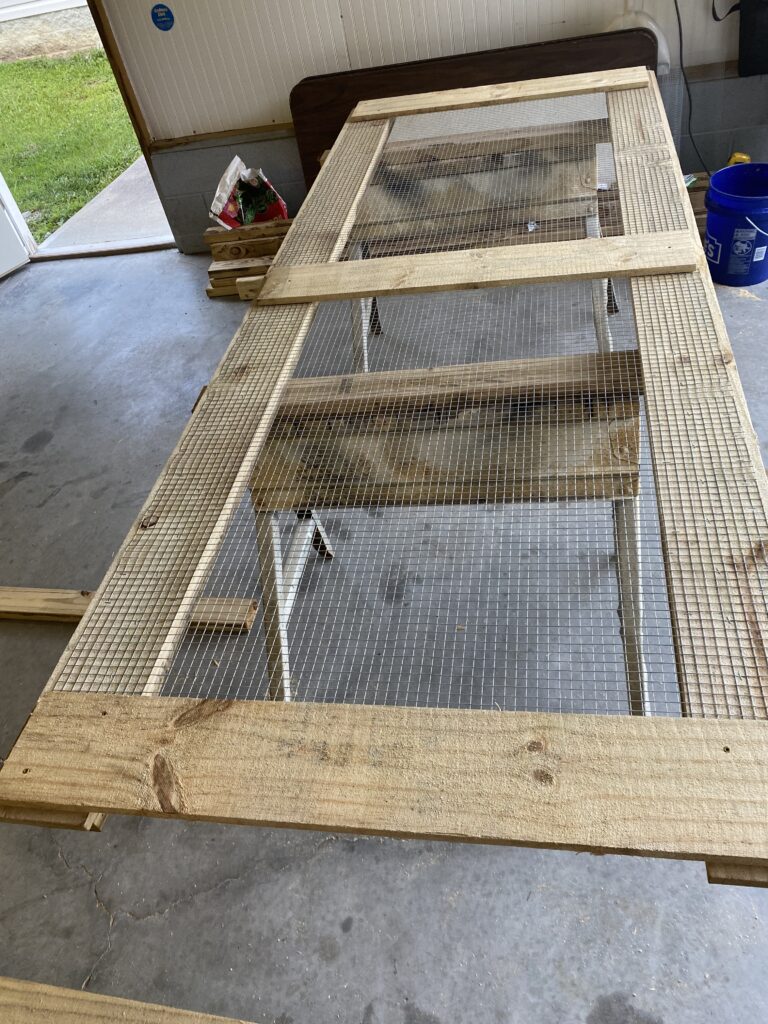
Construction was very simple – I made the sides a smidge over 36″ wide so that I could attach the hardware cloth without trimming for more than length ?
The ends have a pair of 36″ long boards cut into trapezoids with 30° ends, and a butted ~30″ trapezoid, again with 30° ends (see photo for detail). The butt joint is secured via stapled hardware cloth (wrapped around from the outside to the inside (see photo), and a small covering inside screwed into both upright pieces. I used various pieces of scrap for those butt joint covers
Wrapping the hardware cloth around the ends was the single most time-consuming (and painful!) aspects of construction. Start with a 36″x36″ piece, laid-out square to the bottom of the end. Clamp in place (these 3″ spring clamps from Harbor Freight were a true godsend), and staple as desired … I may have gone a little overboard on the stapling front ?. On the second coopette, I relied more on sandwiching a little extra fence picket material to capture the hardware cloth, and a little less on staples.
Lessons Learned
Prototype 1 was quick-and-dirty – too much stapling, shouldn’t have had the door hinge at the top, needed to be more stable (sandwich the hardware cloth better)
And two hasps holding the ends on is not sufficient – you need three (one more-or-less at each corner) to really keep the end locked well, and to enable easy movement
Prototype 2 was not as dirty … but moving from fence pickets to 5/4 would be preferable
Likewise, wish I had put enough support at the bottom to be able to put some casters on at least one end to facilitate moving around the yard (to prevent killing-out the grass underneath)
What would I do differently in the future?
- Make them longer than 8 feet (if you use 5/4 deck boards, buy the 10, 12, or 16 foot variety)
- Make the sides slightly higher than 36″ to reduce the need for cutting hardware cloth (a very time-consuming task!)
- Add wheels to one end for easy movement
- Plan for an suspended waterer (the gap at the top happened to be wide enough to sling on up using a little rope and a couple carabiners – but it easily could not have been)
- Hard-roof one end instead of using a tarp … or use a slightly larger tarp that would cover multiple coopettes at once instead of small ones that cover one at a time



Comment on “a-frame coopettes for raising chicks”
Comments are closed.